
Latest Version
1.0-2025-10-05
March 04, 2026
Defiant Technologies, LLC
Tools
Android
0
Free
com.defianttech.diskdigger
Report a Problem
More About DiskDigger photo/file recovery
Ultimate Guide to Recovering Lost Files with DiskDigger
In today's digital age, losing important files can be a frustrating experience. Fortunately, tools like DiskDigger offer a reliable solution for recovering lost data. This article will explore how to effectively use DiskDigger to retrieve your files, whether they are stored in the cloud or on your device.
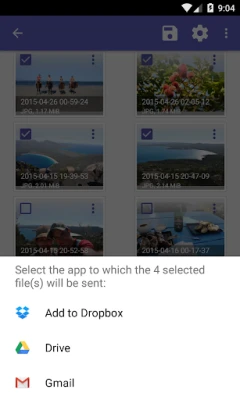
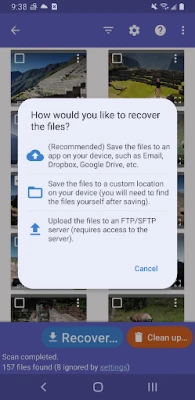
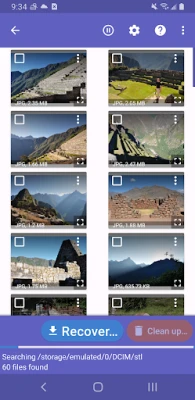
Seamless File Recovery Options
DiskDigger provides multiple options for recovering your lost files. You can easily upload your recovered data directly to popular cloud storage services such as Google Drive and Dropbox. Additionally, the app allows you to send files via email or save them to a different local folder on your device. This flexibility ensures that you can access your recovered files in the way that suits you best.
Permissions Required for Optimal Performance
To maximize the effectiveness of DiskDigger, it is essential to grant the app the "Access all files" permission on your device. This permission enables DiskDigger to search all locations on your device for lost and recoverable files. When prompted, make sure to enable this permission to allow the app to perform a thorough search.
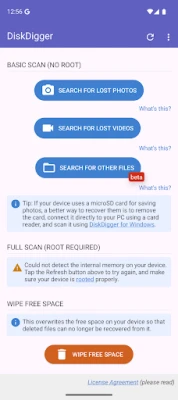
Understanding Search Limitations Based on Device Status
DiskDigger's file recovery capabilities vary depending on whether your device is rooted or not:
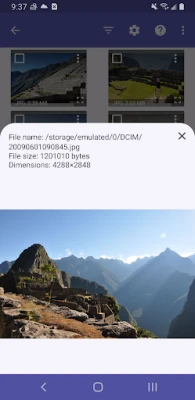
- Non-Rooted Devices: If your device is not rooted, DiskDigger will conduct a "limited" search. This search includes a full scan of your existing internal storage, thumbnail caches, databases, and more. While this method may not recover all lost files, it can still retrieve a significant amount of data.
- Rooted Devices: For users with rooted devices, DiskDigger can perform a comprehensive search of your device's memory. This allows the app to locate any trace of photos, videos, and various other file types, significantly increasing the chances of successful recovery.
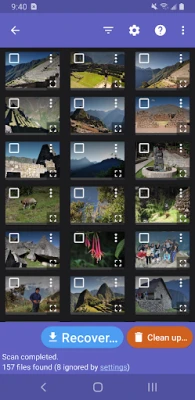
Post-Scan Options: Cleaning Up and Wiping Free Space
Once the scanning process is complete, you have several options to manage your recovered files:
- Clean Up: Tap the "Clean up" button to permanently delete any items you no longer need. This feature is currently experimental and is available only in the Basic Scan mode.
- Wipe Free Space: Use the "Wipe free space" option to erase any remaining free space on your device. This action ensures that deleted files cannot be recovered, providing an extra layer of security for your data.
For Advanced Recovery: Consider DiskDigger Pro
If you require more advanced recovery options or need to recover files directly over SFTP and other methods, consider upgrading to DiskDigger Pro. This premium version offers enhanced features that can help you retrieve a wider variety of file types and improve your overall recovery experience.
Conclusion: Take Control of Your Data Recovery
DiskDigger is a powerful tool for anyone looking to recover lost files. By understanding the app's capabilities and following the necessary steps, you can effectively retrieve your important data. Whether you choose to upload your files to the cloud or save them locally, DiskDigger provides the flexibility and functionality you need. For complete instructions and further details, visit DiskDigger's official website.
Rate the App
User Reviews


Popular Apps


Editor's Choice