Latest Version
9.1.0
December 27, 2024
Y2PROM
Tools
Android
0
Free
com.bakedspiderfree
Report a Problem
More About DIGITAL CLOCK SHG2 LITE
Ultimate Guide to Alarm and Notification Settings for Your Android Device
Managing alarms and notifications on your Android device can significantly enhance your daily routine. This comprehensive guide will walk you through the essential steps to set up alarms, customize notification sounds, and optimize your clock settings for a seamless experience. If you encounter any bugs or issues, please report them directly via email at y2prom@gmail.com.
How to Set Up Alarms on Your Android Device
Setting alarms is straightforward. Follow these steps to ensure you never miss an important reminder:
- Select an Alarm: Choose the desired alarm task from your alarm list and open the alarm settings.
- Set Alarm Time: Use the Alarm time option to specify when you want the alarm to sound.
- Choose Alarm Sounds: Under Alarm sounds, select your preferred music file to play at the designated time.
- Enable Vibration: If you want your alarm to vibrate, select the Vibration option.
- Configure Snooze Time: Set the duration for the snooze feature under Snooze time.
- Adjust Alarm Volume: Set the volume level for your alarm under Alarm volume.
- Schedule Alarm Days: Specify which days of the week the alarm should activate using the Alarm day option.
- Activate the Alarm: Ensure the alarm is enabled by toggling the button on the left side of the alarm list.
- Check Power Settings: Be aware that Android's low power consumption feature may disable alarms. Confirm that the application is set to start automatically.
Customizing Notification Sounds
Personalizing your notification sounds can enhance your user experience. Here’s how to set them up:
Setting Time Signal Sounds
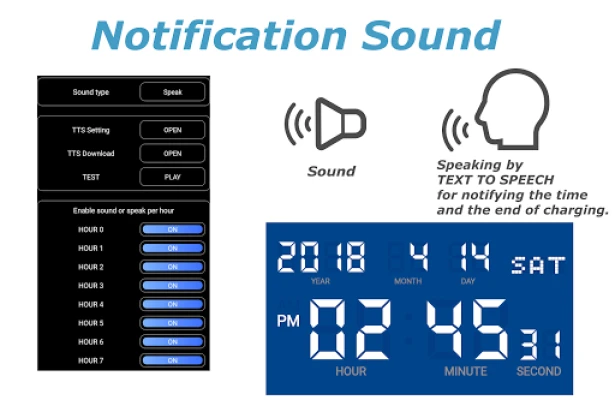
- Access the options menu and select Notification sound followed by Time signal.
- Choose Sound Type: Select from OFF, Sound, or Speaking.
- If you choose Sound, a sound will play at the start of every hour.
- If you select Speaking, the device will announce the current time at the start of each hour.
- In the official version, you can change the sound type under Sound Select.
- Restrict sound playback times in the official version by enabling sound or speak per hour.
Setting Charging Completed Sounds
- From the options menu, select Notification sound and then Charge completed.
- Choose Sound Type: Select off, sound, or speech.
- If you select Sound, a sound will play when charging is complete.
- If you choose Speaking, the device will announce, "Charging was completed" upon completion.
- In the official version, you can change the sound from the sound selection menu.
Configuring Text-to-Speech (TTS) Settings
To utilize the reading function, you must configure TTS settings. This application supports the Google Text-to-Speech engine. Follow these steps:
- Open the TTS settings from the TTS setting option in your Android system settings. Ensure the Google Text-to-Speech engine is installed.
- Access the TTS Download option to download or update the Google Text-to-Speech engine.
- Use the Test feature to check the TTS functionality. If there are issues, revisit the TTS settings.
Customizing Your Clock Settings
Enhancing your clock display can improve usability. Here’s how to customize it:
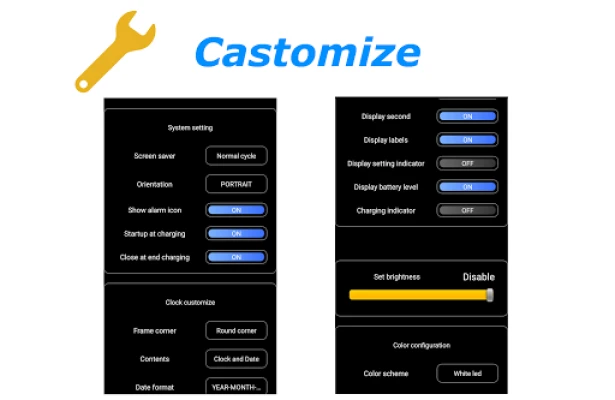
- Activate Screensaver: Use the Screensaver option to prevent screen burn-in.
- Set Clock Orientation: Adjust the clock orientation under Orientation.
- Startup at Charging: Enable the clock to launch automatically when USB charging begins.
- Close at End Charging: Set the clock to close when charging ends.
- Select Frame Corners: Choose between rectangle or round corner frames. Note that rounded corners may not be visible on a black background.
- Display Contents: Customize the time and date displayed on the screen.
- Change Date Format: Adjust the order of year, month, and day in the Date Format settings.
- Set Time Format: Choose between 12-hour or 24-hour formats in the Time format settings.
- Toggle Colon Blinking: Enable or disable the blinking colon in the Colon blinking option.
- Display Seconds: Choose whether to show seconds in the seconds display settings.
- Label Display: Toggle the presence of labels in the Label display settings.
- Setting Status Display: Enable or disable the display that shows the status of alarm and notification settings.
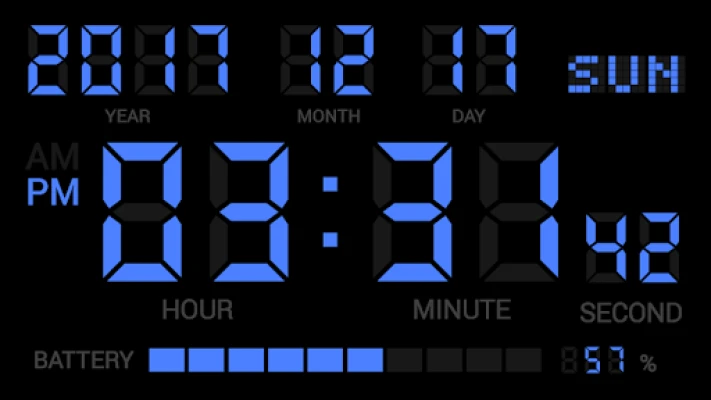
- Battery Level Indicator: Choose to display the remaining battery level with the Battery level indicator.
- Charging Indicator: Visualize battery charging status with the Charging indicator.
- Adjust Screen Brightness: Modify the brightness of the clock display under Screen brightness.
- Set Color Scheme: Customize the digital clock's color scheme. In the paid
Rate the App
User Reviews
Popular Apps


Editor's Choice


